Admin Help

Your most burning questions answered...

How To Log In and get to the Dashboard.

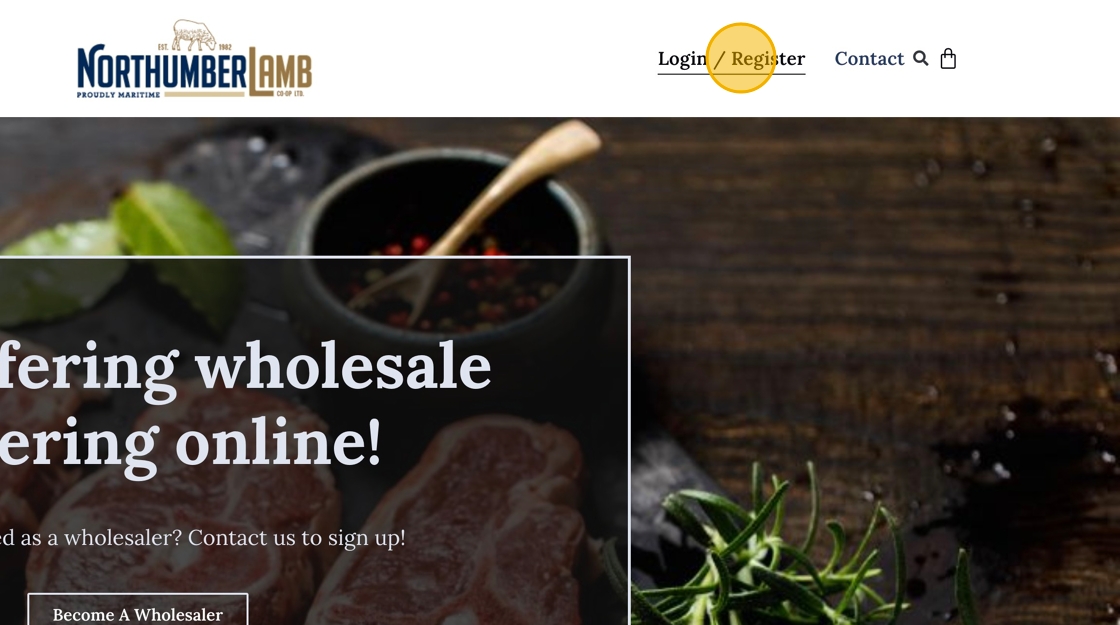
1. Click “Login / Register”

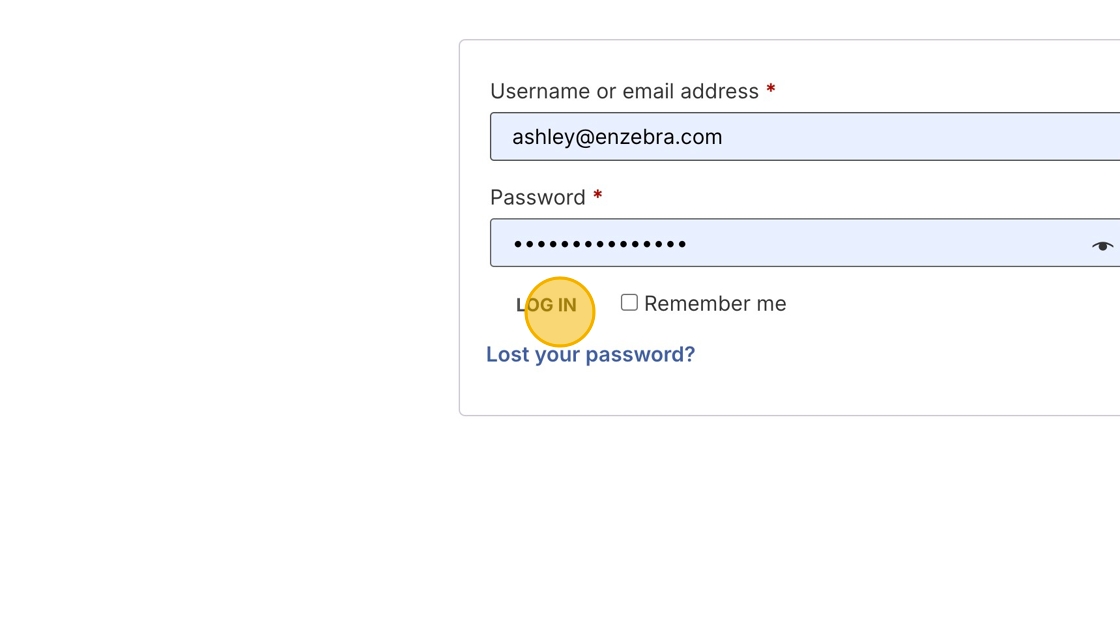
2. Enter your email and password.

3. Click “Log in”

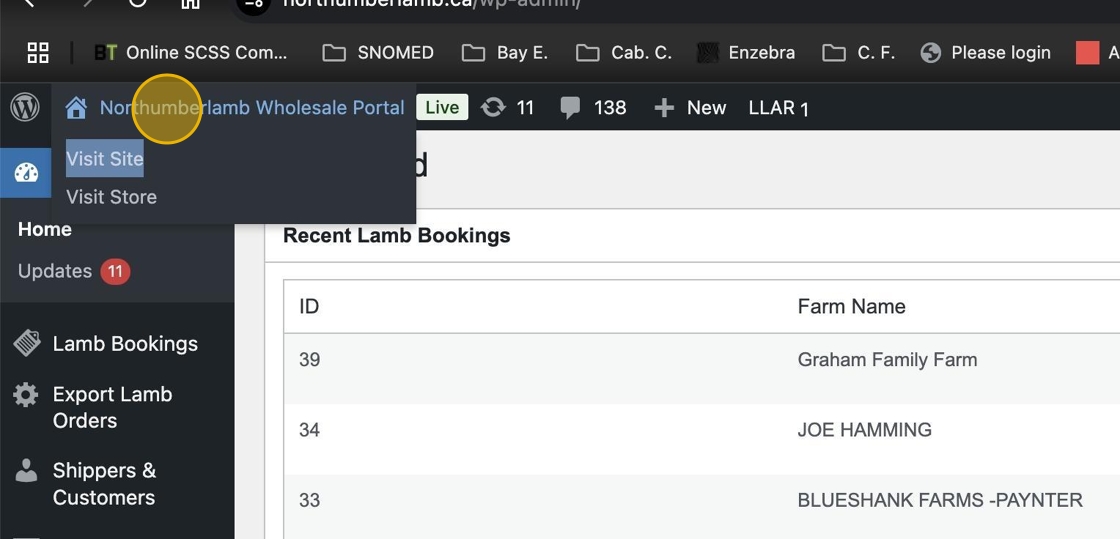
4. Click the Site title to go the the Dashboard.

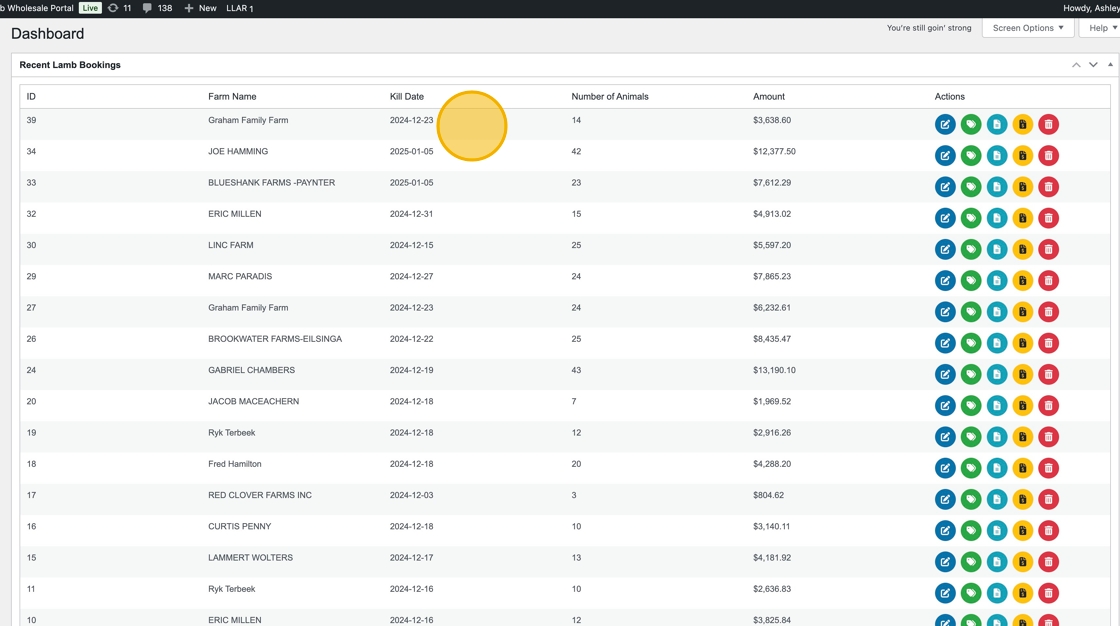
5. Have fun with all the lamb bookings!

6. Click here.

Setting Base Prices for Lamb, Light Lamb, and Mutton

1. Login to the website and click the site title where it says “Northumberlamb Wholesale Portal” to get to the back end. top left of screen.

2. Click “Set Base Price”

Tip: Before setting the base price make sure your past bookings are marked as “Approved”.

3. Enter the prices you wish to be set for the base.

4. Click Save Changes.

How To Add A New Lamb Booking and Print Labels

1. Login to the website and click the site title where it says “Northumberlamb Wholesale Portal” to get to the back end. top left of screen.

2. Click “Add New Booking”

3. Select the “Shipper at the top” and select the Select User Button

4. Fill in all the booking details that you can.

5. Fill in the “Admin-Only Fields” if the lambs are here.

6. Click this the Add a Lamb button to and enter the lamb.

Alert: Do not enter more than one species per form!

7. Enter in all the details of the lambs that you have including grading if you’re doing this after grading.

8. When you’re finished entering lamb change your booking to “submitted”. This prevents the shipper from editing it. Click the Update Booking button.

9. Go back to “Lamb Bookings”. Next you print labels and CFIA forms (that is if they didn’t hand them to you already). Mostly applicable if the shipper entered them.

10. Click the green “Label” button to print the labels. The teal button next to it is for the CFIA forms if needed. Blue button is to edit your booking. Always edit your booking with a status of Submitted or change it prior to making any edits on lambs or else your invoice won’t recalculate.

Print Carcass Labels

1. From the “Dashboard” click the “Print Labels” button for your shipment. Your pdf carcass labels will download.

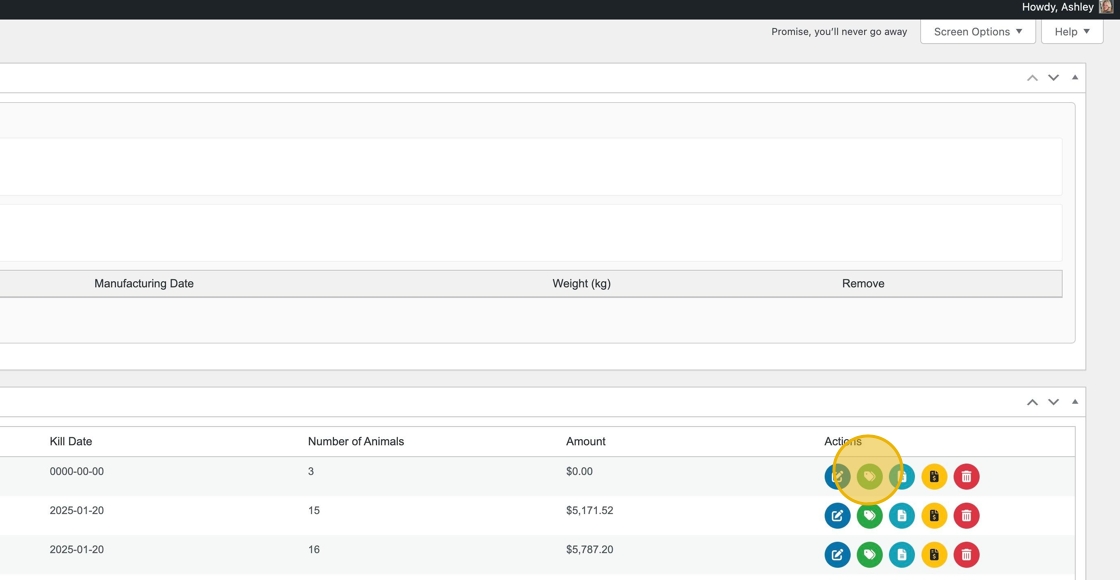
2. Open the pdf and print on the label printer at the office. Throw these in the carcass for grading.

Export CFIA forms

1. From the Dashboard select the teal “Export CFIA Forms” button. Tour file will download.

2. Open the file and print to have available when the shipper arrives.

How to Grade a Lamb (via Tablet App)

1. Locate the Code: On the lamb carcass label, find the “Key in Code.”

2. Enter and Submit: Type the code into the app and tap Submit.

3. Complete the Fields: Enter the details for Weight, GR, Leg, Loin, and Shoulder. To correct any errors, tap Clear. When all information is entered, tap Submit Grading.

Tip: If you made a mistake re-enter the key in code in the next view and submit it again.

Update or Grade Lambs via the Admin Backend

1. Load Shipment: Select Edit to open the shipment record.

2. Receive & Update: Once the lambs arrive, update the relevant fields (e.g., Kill Date, Pen, Live Weight).

3. Enter Details: Update or enter Weight, GR, Leg, Loin, and Shoulder. If needed, add the sheared bonus or switch to Light Lamb. (Animal types can be mixed.)

4. Save Changes: When finished, select Update Shipment.

5. Finalize & Approve: Select Approved to lock in the grading values, then click Update Shipment again.

Tip: If you change the base price before approving, the system will use the current base price when you eventually approve. If this happens, simply revert the base price to its original value and mark the shipment as Approved. Once approved, the shipper can see their pending payout.